Setting up a home theater feels daunting when you’re staring at a wall of cables, speaker options, and confusing acronyms. The good news? A solid home theater installation is totally achievable for motivated DIYers who plan carefully and follow a logical sequence. This guide walks you through the essentials, from assessing your room and picking the right display to running cables cleanly and tuning acoustics, so you end up with a genuinely immersive setup that works and looks professional.
Table of Contents
ToggleKey Takeaways
- Proper home theater systems installation starts with assessing your room’s space, lighting control, electrical capacity, and viewing distance before purchasing any equipment.
- A 5.1 audio setup with a quality center channel speaker, matched front speakers, surround speakers, and a subwoofer is the practical minimum for immersive sound without complexity.
- Use HDMI 2.1 cables for 4K content, run speaker cables separately from power cables at right angles, and label everything with tape to prevent future troubleshooting headaches.
- Room acoustics matter as much as equipment: balance hard surfaces with soft materials, treat bass modes through strategic subwoofer placement, and add 4–6 acoustic panels for 20–30% wall coverage.
- Invest in proper mounting hardware and stud finders for TV installation, avoid drywall anchors alone for heavy displays, and calibrate your AV receiver using its built-in microphone for optimal performance.
Understanding Home Theater Basics and Room Requirements
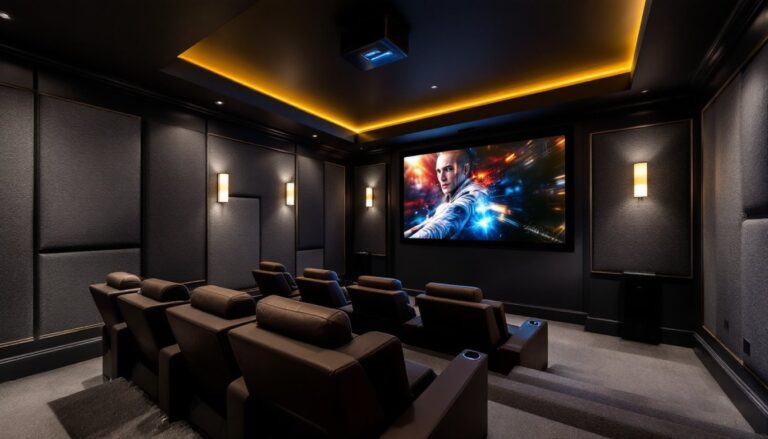
Before buying a single component, assess your actual room. Home theater quality depends heavily on space, not just equipment. Ideally, you want a dedicated room, or at least one where you can control light and sound. A living room that pulls double duty as a nursery or kitchen will always compromise your experience.
Measure the space carefully. Viewing distance matters: for 4K content, sit 1.2 to 1.5 times the screen diagonal away: for 1080p, go with 1.5 to 2.5 times. If you have a 65-inch TV, that’s roughly 8 to 10 feet back. Smaller rooms suit projectors better than large TVs because they create the perception of scale without dominating the space.
Check your electrical capacity. A home theater with an AV receiver, subwoofer, amplifiers, and projector can draw 500–1,500 watts continuously. Verify your circuit breaker has adequate amperage, typically 15 amps per circuit. If you’re uncertain, consult an electrician. Never overload a circuit. Ventilation matters too: AV receivers and amplifiers generate heat. Plan for 6 inches of clearance around equipment, especially the top and back.
Identify structural realities. Are you mounting speakers in drywall or installing floor stands? Drywall studs are typically 16 inches on center. A stud finder (10–20 dollars) saves headaches. For larger speakers or televisions, stud mounting is essential, drywall anchors alone won’t safely hold significant weight for long.
Essential Equipment and Component Selection
Your core setup includes a display (TV or projector), an AV receiver (the hub that processes audio and video signals), speakers, a media player, and cables. Start by listing non-negotiables: budget, display size, and whether you want a projector or TV. This drives everything else.
Choosing the Right Display and Projector
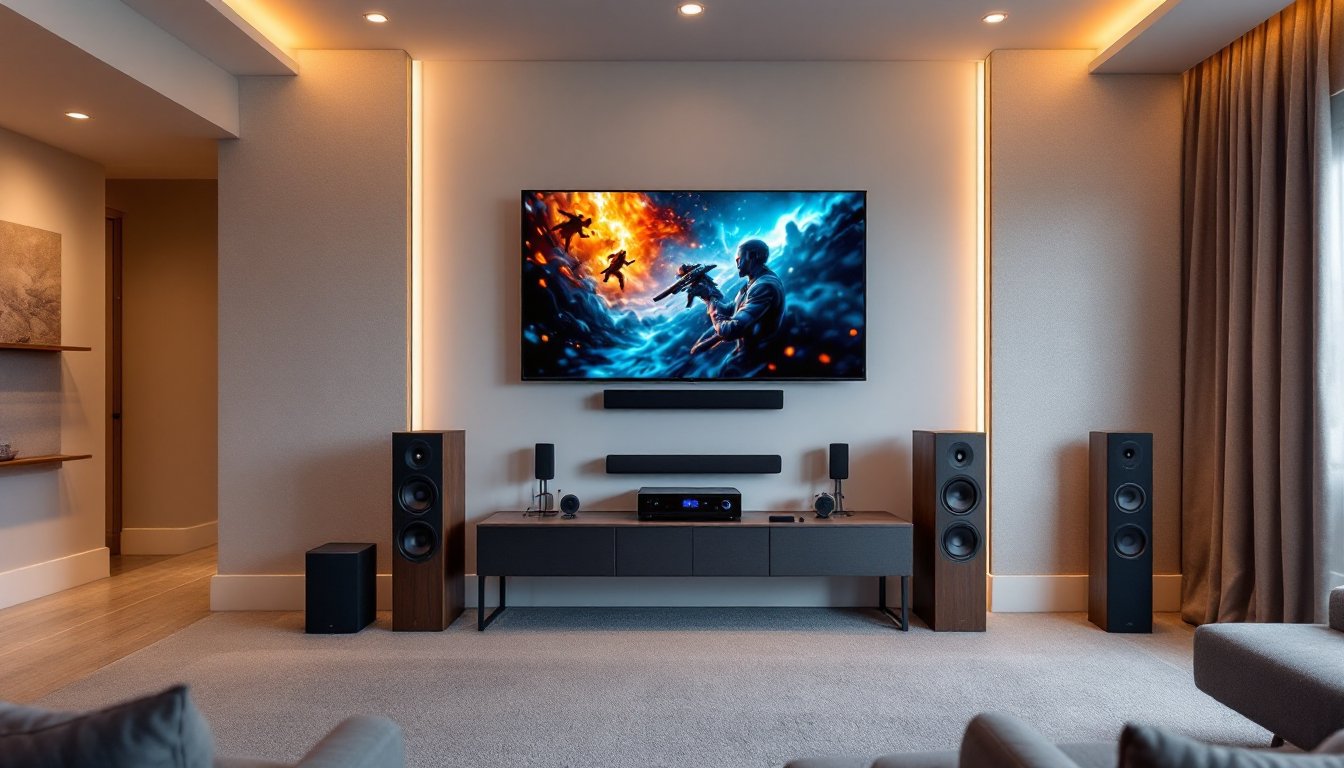
For TVs, a 4K model with 60 Hz (or higher) refresh rate suits both movies and sports. OLED provides deeper blacks and better contrast than LED, but costs more and can suffer image burn-in with static content. For a family room that runs the news all day, LED is safer. Size: go bigger than you think, but not so huge that you’re uncomfortable turning your head at a normal viewing distance.
Projectors work brilliantly in dedicated rooms with blackout control. A 1080p projector is adequate for most content: 4K projectors are sharp but pricier. Brightness matters, at least 2,000 lumens for a darkened room, 3,000+ if you can’t fully control light. Throw distance (how far the projector sits from the screen) affects placement: check the spec sheet before buying. Most projectors require a proper screen, not a blank wall, to avoid keystoning and preserve image quality.
When evaluating options, cost-conscious setups are possible, recent buying guides for home theater equipment show how to balance performance and budget across different screen types.
Audio Setup: Speakers and Sound Configuration
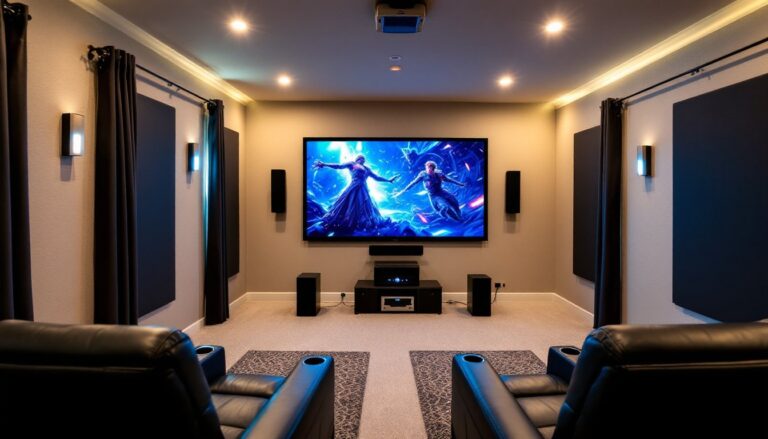
Audio is where most DIYers stumble. A great picture is worthless if dialogue is muddy or you can’t hear an explosion. A standard 5.1 setup (front left, center, right, two rear surrounds, and a subwoofer) is the practical minimum for immersion without vanishing into overkill.
The center channel speaker is the most important, it anchors dialogue and on-screen action. Don’t skimp here: match it (as closely as possible) to your front left and right speakers by brand and series. Mismatched channels sound disjointed.
Front speakers handle music and effects. Bookshelf speakers (8–10 inches tall) sit nicely on shelves or stands: floorstanding speakers take up more room but deliver deeper bass naturally. Surround speakers (smaller, often wall-mounted) create ambient sound and effects like rain or a crowd.
A subwoofer reproduces low frequencies below 80 Hz that small speakers can’t handle. One quality sub beats two cheap ones. Size ranges from 8-inch to 15-inch drivers: bigger rooms typically need larger subs. Place it in a corner or along a wall, bass is less directional, so exact placement is flexible compared to front speakers.
For wiring, run speaker cables behind the TV and along walls (or inside conduit) to surrounds. Speaker cable gauge: 14 AWG is fine for most residential runs under 50 feet: if your run exceeds 100 feet, bump up to 12 AWG to minimize resistance and signal loss. Soldering connections is superior to cheap push-clip connectors, invest in a basic soldering iron (20–40 dollars) and some solder.
Wiring, Cable Management, and Installation Best Practices
Cable chaos looks unprofessional and invites problems. Plan your runs before stripping insulation. Measure twice, route thoughtfully, you don’t want cables kinked, pinched, or run alongside power lines (which introduce hum).
Use HDMI 2.1 cables for 4K/60Hz or higher playback and future-proofing. They’re a few dollars more than older HDMI versions but eliminate compatibility grief. Label every cable end with tape and a Sharpie, future you will be grateful when troubleshooting.
Keep speaker cables separate from power cables. If they must cross, do so at right angles. Audio-grade cables cost more but reject interference better: for runs longer than 25 feet, they’re worth it. Budget around 1–2 dollars per foot for decent speaker cable.
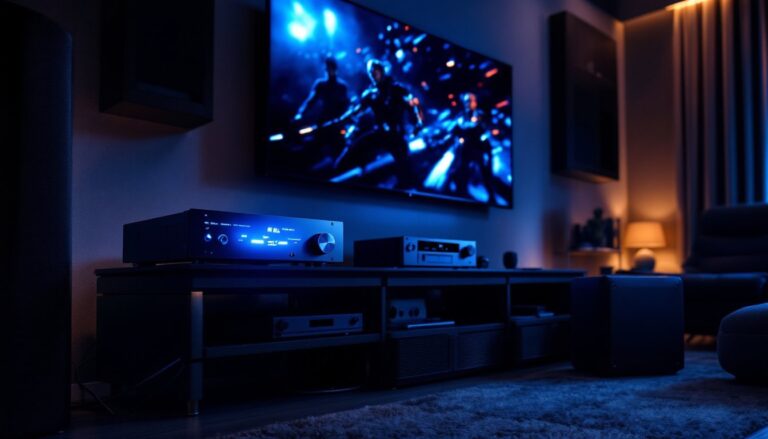
For the AV receiver, position it in a ventilated equipment rack or open shelf, never enclosed in a cabinet without airflow. Route cables out the back: avoid sharp bends that crimp shielding. Use velcro cable ties (not zip ties, which crush insulation over time) to bundle runs neatly.
Wall mounting a TV requires a VESA-compliant mount rated for your TV’s weight. Find studs with a stud finder, drill pilot holes, and use lag bolts, never rely on drywall anchors alone. A TV over 55 inches should be installed by two people. If you’re uncomfortable with drilling or mounting, that’s a legitimate time to call a professional. Recent contractor reviews and hiring guidance offer vetted installers for complex setups.
Room Acoustics and Optimization Tips
A well-wired system in an untreated room sounds flat and echoes. Hard surfaces (tile, concrete, glass) bounce sound everywhere. Soft materials (carpets, curtains, upholstered furniture) absorb it. Aim for balance.
Bass modes are the biggest culprit. If your subwoofer resonates uncontrollably at certain frequencies, you’ve got a room mode. Experiment with placement: move the sub slightly and listen. A corner isn’t always best: sometimes the opposite wall produces cleaner bass. Toe-in your front speakers slightly (angle them toward the listening area) for better stereo imaging.
Acoustic panels (mass-produced or DIY) tame reflections. They’re fabric-covered rigid insulation. For a first-timer, 4–6 panels (roughly 2×4 feet each) placed on side walls and behind seating handle the worst offenders. You don’t need to cover every inch, that deadens the room too much. Aim for 20–30% coverage.
Curtains and heavy drapes are cheap acoustic help: layering them behind your TV masks reflections. A thick area rug under seating absorbs footfall noise and standing waves. All of this is cosmetic, no permits needed, completely reversible.
Once everything’s installed, calibrate your AV receiver. Most have a built-in calibration microphone that measures speaker levels and distance. Follow the on-screen prompts. Manual tweaking (adjusting crossover frequency, subwoofer level, and delay) refines things further. A projector or TV’s factory calibration mode may be available, check the manual. Understanding how home automation integrates with your theater will enhance usability, and current smart home trends and updates discuss integration approaches.
Conclusion
A home theater isn’t a one-weekend project, plan for a few days of setup, wiring, and tuning. The payoff is real: watching films, sports, or gaming in your own space without compromises. Prioritize prep work, invest in the right pieces for your room, and don’t rush the acoustic tuning. Start with solid fundamentals, and you’ll enjoy your setup for years.