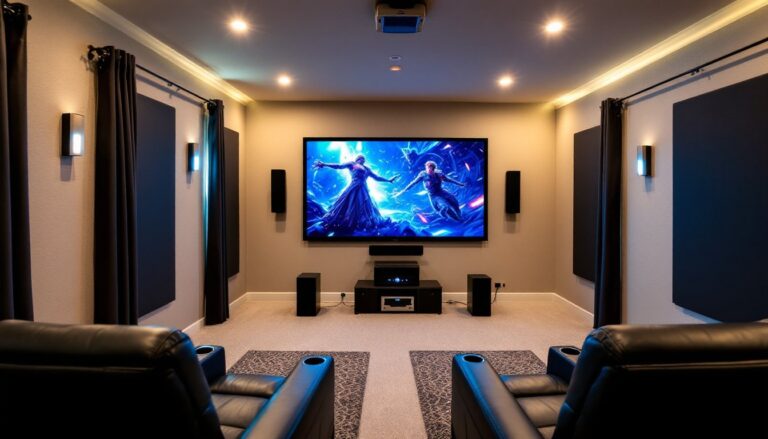
Setting up a home theater goes beyond just buying a projector, the screen you choose makes all the difference in picture quality, viewing experience, and how well the whole system works together. Many homeowners underestimate how much the screen itself impacts brightness, contrast, and color accuracy. Whether you’re converting a basement into a cinema or upgrading an existing setup, understanding your screen options will help you avoid costly mistakes and get the best picture for your space and budget.
Table of Contents
ToggleKey Takeaways
- A quality home theater projector screen with engineered reflective coatings is critical for delivering accurate brightness, contrast, and color—even high-end projectors can’t overcome a poor screen.
- Fixed screens provide the best picture quality by keeping fabric taut and flat, while motorized screens offer convenience and flexibility at the cost of slight performance loss and higher upfront expense.
- Choose white matte screens for versatile viewing angles and rooms with ambient light, or silver/gray high-gain screens for dark rooms with centered seating to maximize brightness.
- Calculate your ideal home theater projector screen size using the 1.5 to 2.5 times viewing distance rule—a 12-foot viewing distance calls for roughly a 96–100 inch screen.
- Secure your screen installation to wall studs or ceiling joists with heavy-duty fasteners, avoid drywall anchors, and hire a professional for screens over 100 inches or complex electrical runs.
- Perforated screen material allows sound to pass through for speaker placement behind the screen, making it ideal for integrated home theater designs despite slight brightness reduction.
Why Projector Screen Quality Matters for Your Home Theater
Your projector is only as good as the surface it’s projecting onto. A cheap or wrong-type screen will swallow light, create hot spots (bright spots in the center), and wash out colors, even if you’ve invested in a high-end projector. Quality screens use engineered fabrics with specific reflective coatings that spread light evenly across the viewing area while maintaining brightness and color accuracy.
The screen material also affects the viewing angle. Budget screens narrow the sweet spot: viewers sitting off to the side see a dimmer, less vibrant image. Professional-grade screens maintain color and brightness across a wider angle, which matters if your seating isn’t perfectly centered. Also, the frame construction (whether it’s rigid or flexible) affects how flat the surface stays. Even small wrinkles or sags degrade picture quality, especially on larger screens where imperfections become obvious.
Another often-overlooked factor is ambient light rejection. If your room isn’t totally dark, a screen with the right reflective properties will preserve contrast better than a basic white wall ever could. This is why dedicated projector screens command a price premium, they’re engineered to solve real optical problems that impact your viewing experience.
Types of Projector Screens: Fixed vs. Motorized vs. Portable
Projector screens come in three main flavors, each with tradeoffs in performance, cost, and ease of installation.
Fixed Screens: Permanent and Performance-Focused
Fixed screens are mounted permanently to the wall or ceiling and don’t move. They deliver the best picture quality because the frame keeps the fabric perfectly taut and flat, no wrinkles, no sag. This rigidity means consistent brightness and color across the entire screen. Fixed installations also look cleaner: there’s no mechanism to hide or maintain. The downside is commitment: you’re dedicating that wall or ceiling space permanently, and removing or relocating one requires uninstalling the frame and patching the wall.
Fixed screens come in two formats: 1.78:1 (16:9 widescreen) for movies and most streaming content, or 2.35:1 (scope) for films shot in theatrical aspect ratio. Widescreen is the safe choice for most homes. Setup involves mounting a rigid aluminum or steel frame securely to wall studs or ceiling joists (critical for heavier 100–120-inch screens), stretching the fabric, and tensioning it evenly. Professional installation isn’t always necessary for smaller screens, but for anything over 100 inches, a second pair of hands is wise.
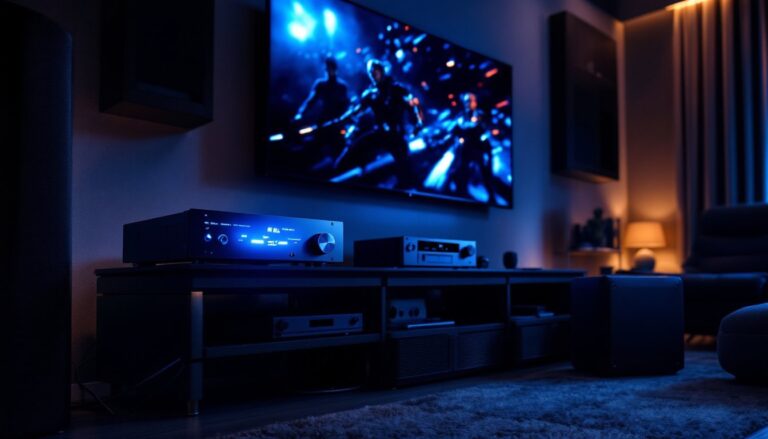
Motorized Screens: Convenience Meets Flexibility
Motorized (electric) screens roll down from a ceiling-mounted case and retract when not in use. They’re ideal if you want to hide the screen between movie nights or share the room for other activities. The motor is usually controlled by a remote or wall switch, and many integrate with smart home systems.
The tradeoff is slight performance loss. The fabric must be flexible enough to roll, so it’s typically thinner than fixed-screen material and won’t stay quite as flat. Motorized screens also introduce moving parts, the motor, the tensioning system, and the roller mechanism, which can eventually wear out or need repair. Also, motorized models cost more upfront (usually 40–60% more than comparable fixed screens). Installation is more complex because you’re running electrical to the ceiling mount, and you’ll want to be confident in your wiring work, or hire a professional electrician if running new circuits.
Screen Materials and Surface Finishes Explained
Screen fabrics fall into two broad categories: white matte and silver/gray reflective.
White matte screens are the most forgiving and versatile. They scatter light evenly across a wide viewing angle, so people sitting anywhere in the room see a decent image. They have lower gain (typically 1.0 gain, meaning they reflect 100% of the light hitting them). White screens are great if your room isn’t completely dark or if you have multiple viewing angles. They’re also more affordable.
Silver and gray screens have higher gain (1.2–1.5) and focus light back toward the center, making the image appear brighter in a dark room. This is perfect for high-lumen projectors or smaller rooms where the projector throws light at a shallow angle. The tradeoff: the viewing angle narrows, and off-axis viewers see a dimmer image. Hot spotting can also occur on ultra-high-gain screens if the projector lamp isn’t properly aligned.
You’ll also encounter specialty finishes. Perforated screens have tiny holes that allow sound to pass through, useful if you’re mounting speakers behind the screen. The holes are small enough to be invisible to the eye, but they do reduce brightness slightly compared to non-perforated fabric.
When selecting material, consider your room brightness and viewing setup. Darker rooms with viewers centered in front of the screen benefit from silver screens. Brighter rooms or wider seating arrangements favor white. Many experts, including reviews from the best projector screens for home theater, recommend white matte for flexibility and ease of use in most residential settings.
Sizing Your Screen: Dimensions and Viewing Distance
Screen size is the hardest decision because it depends on your room and viewing distance. The rule of thumb is viewing distance should be 1.5 to 2.5 times the screen width. So if you’re sitting 10 feet from the screen, you want a screen roughly 50–67 inches wide. Sitting 15 feet back? You’re looking at 75–100 inches.
To convert viewing distance into screen size, divide the distance (in feet) by 1.5 to get the minimum width in feet, then multiply by 12 to get inches. A 12-foot viewing distance divided by 1.5 equals 8 feet, or 96 inches, roughly a 100-inch screen.
Common screen sizes in inches are: 60, 72, 84, 100, 120, 150. Odd-sized screens exist but are special orders and expensive. Standard sizes use common fabric widths, which keeps costs down. When ordering, confirm the viewable area (the actual image space) versus the case dimensions (which are larger to accommodate the frame).
Don’t just eyeball it. Measure the distance from your seating to the wall (or ceiling) in feet, then calculate. An undersized screen feels like watching a phone screen, you’re constantly refocusing on the details. An oversized one can cause neck strain and loses the immersive sweet spot. Expert reviews and buying guides break down sizing formulas and show real-world examples across different room layouts, which can help you visualize the right choice.
Installation Tips for Homeowners: Wall vs. Ceiling Mounting
Installation method depends on your room layout, ceiling height, and whether you want the screen hidden when not in use.
Wall mounting is simpler for fixed screens. You locate wall studs (16 or 24 inches on center in most homes) and mount the frame brackets directly to them using lag bolts or heavy-duty fasteners. A stud finder is essential, drilling into drywall without hitting studs will fail under the weight of a large screen. Mark stud locations with a pencil, then mount brackets so they span at least two studs per side. For screens under 80 inches, two mounting points per side usually suffice: larger screens need three or four.
Measure from the floor to center the screen at eye level when seated (typically 48–54 inches from the floor to the screen center). Use a level and a tape measure to ensure the frame is perfectly horizontal, even a 1/4-inch tilt is visible and will annoy you forever.
Ceiling mounting is necessary for motorized screens and works for fixed ones if wall space is limited. Mounting to the ceiling means hitting ceiling joists (typically 16 inches on center). Locate them with a stud finder, drill pilot holes, and use heavy-duty lag bolts or through-bolts. Never rely on drywall anchors for ceiling-mounted screens: the weight is too much.
For motorized screens, plan the electrical run before installation. The motor power cord needs to reach a nearby outlet or a switched circuit. If running new wiring, this is a job for a licensed electrician, don’t improvise with extension cords. Proper wiring ensures safety and avoids tripping breakers every time the screen moves.
Before drilling, use a non-contact voltage tester to check for hidden electrical wires in walls and ceiling. Many DIY home theater disasters start with drilling into live circuits.
For larger installations (100+ inches) or if you’re not confident in your framing knowledge, hire a professional installer. They have the tools, experience, and insurance to handle heavy lifting safely. Curated recommendations and room setup examples often showcase professional installations that illustrate proper mounting techniques.